Insert your DVD in your DVD ROM, and start
up DVDDecrypter.
|
| |
DVDDecrypter will automatically select the movie, and create
a folder on the main harddrive.
|
Press the Start Button
 |
| When the process is
finished close down DVDDecrypter |
|
Open DVD2AVI
Go to File>Open>go
to the folder where you saved the DVD, select the first VOB
file,
click Open and DVD2AVI will automatically
select the rest of the VOB files click OK
|
| |
|
| |
Select Video>Color
Space>YUV 4:2:2 |
| |
Select Video>Field
Operation>None |
| |
Select Audio>Dolby Digital>Demux
All Tracks |
|
Press F5 and take a note of the Aspect
Ratio, Frame Rate, and Frame
Type.
If you have Video Type-PAL and the Frame Type
is Interlaced go to the slider bar and move it, if you notice
lines you will need to use a deinterlace feature later on.
If you have Video Type-NTSC or FILM or FILM
that stabilizes at 95%-99% and the Frame Type Is Progressive
Go to Video>Field Operations>Force Film
If you have Video Type-FILM the Frame Type-Interlaced
move the slider bar, if there isnt any lines Go to Video>Field
Operations>Force Film
Press Esc(on the keyboard)
to stop the preview.
|
. |
|
Move the slider bar and you may notice
interlaced artefacts(lines appearing), take a close look at
the image on the right. This means that you need to Deinterlace
the video. So take a note of this. |
|
|
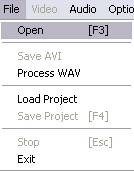
Press F4 or go to File>Save Project,
type in the movies name hit save.
When the process is finished you will have a
d2v file and ac3 or mpa files.
Close DVD2AVI.
|
| |
|
Select Open File, browse to your ripped folder
and select the DVD2AVI project file, next under
Avisynth Version select Avisynth
2.5x.
If yon noticed that the video had interlaced
artefacts as discussed before in the DVD2AVI section, under
IVTC/Deinterlace select Deinterlace.
|
|
| Open DVD2AVI
project file. |
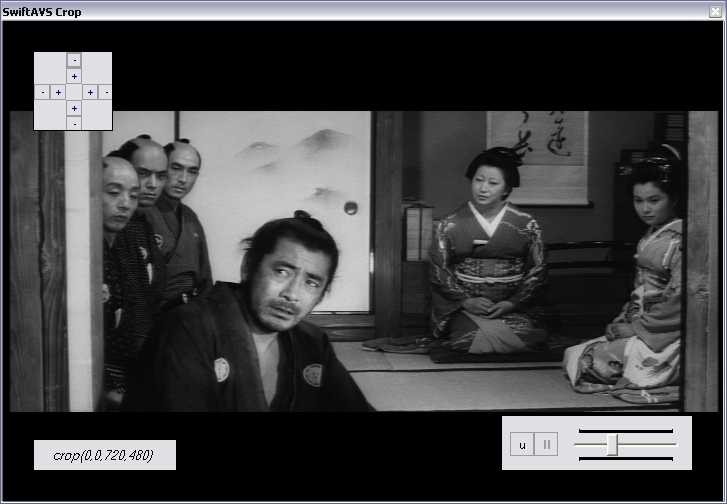
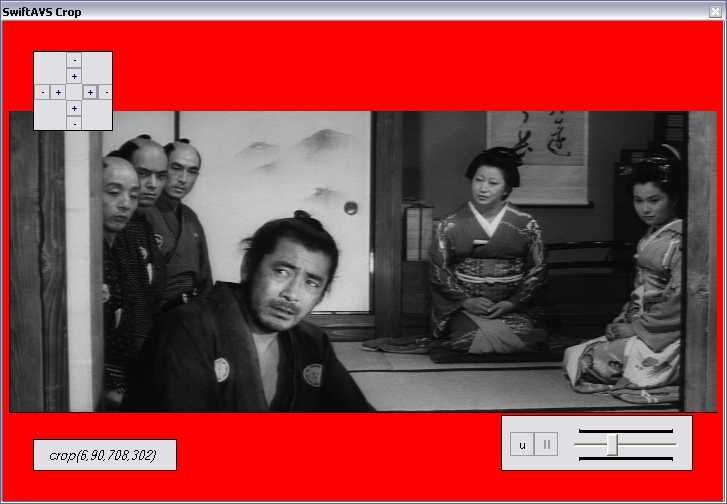
Cropping
Select Crop & Resize tab
|
Select Manual
Crop: select Crop button. |
|
A new window will appear.
|
|
Move the slider bar
until, the black bars are noticable, and crop the with the
tools provided. |
|
Close the window,
click OK when the Crop MOD4 window appears. |
|
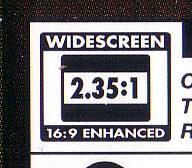
| Look on the back of the DVD cover
where you will find a ratio that relates to the height and
width of the movie (2.35:1). Check the table below (it is
not recommended to go higher than 700 for the width. I have
chosen 640x272, width - 640 height - 272, choose 576 (width)
for lower bitrates. |
|
| 2.40:1 |
2.35:1 |
2.20:1 |
1.85:1 |
1.78:1 |
1.66:1 |
1.33:1 |
| |
|
|
|
|
|
|
| 720x296 |
720x304 |
720x328 |
720x392 |
720x408 |
720x432 |
720x544 |
| 640x264 |
640x272 |
640x288 |
640x344 |
640x360 |
640x384 |
640x480 |
| 576x240 |
576x248 |
576x264 |
576x312 |
576x328 |
576x344 |
576x432 |
| 576x208 |
512x216 |
512x232 |
512x280 |
512x288 |
512x312 |
512x384 |
|
| If the ratio isnt on the DVD cover,
try here http://us.imdb.com/ type the film in search, on
the left of the films page, click on technical specs...... |
(Still on the Crop & Resize tab)
Select Completely Manual Resize in the
boxes type in your desired Aspect Ratio.
Select Bilinear in the Resize
Filter drop down box.
|
Saving the Script
Select the Output tab
Click on Generate AviSynth Script and
then Save the AviSynth script.
|
|
Close SwiftAVS |
|
Audio |
If your DVD came with multiple dubbed audio tracks and/or
commentaries, open the audio files with
Media Player Classic(you may need AC3 filter 0.70 installed).
Select which tracks you want.
(If your going to burn the video to a DVDR or the video
you wish to convert has a short running
time, you can use the demuxed ac3/mpa tracks intstead, so
you can skip the Audio section.)
|
| Go to Source File browse
to the folder and open the ac3 or mpa file(audio) you made
with DVD2AVI. |
|
| Go to Destination
Format go to the
drop down box and select either MP3 or Vorbis.
(If you have never used Vorbis(ogg) for audio,
give to a go). |
|
| Select Options>>
Go to Downmix Type and
select Surround 2.
Under Output Channels, in the Left
and Right or Center(of your audio source
is mono)drop down box select no |
|
Click Options>> again,
If you chose MP3
Leave default settings Preset: Alt
ABR andMode: ABR
Go to Bitrate:
Leave the default settings or chose a higher or lower bitrate.
If you chose Vorbis
Leave default settings or change the Quality.
Click Start

|


|
Repeat the Audio process for the other audio tracks. When
I use more than one audio track such as commentary by directors/actors
I select a lower bitrate such as 56kbps for MP3 or set Vorbis
Quality to 0.00 (64kbps) for CD or use higher rates if burning
to DVDR..
|
Once the encoding has finished close Headac3he.
Go to the ripped folder and determine the size in MB for
all of the mp3 or ogg audio files. What I do is, enable
the Status Bar in Windows Explorer (View>tick
Status Bar), next I press Ctrl on the keyboard
and select/highlight all mp3/ogg files, and the Status Bar
will give me the size in MB.
Take a note of the size.
|
Subtitles |
Open SubRip select
the VOB button in the top right hand corner. |
|
Open
IFO |
|
Browse to ripped folder,
open IFO file.. |
|
Select desired Language
stream from the drop down box. |
Select Start
 |
|
Now for the tricky
section... What is required for you part is to type in the
characters, first character for my part is the uppercase letter
A (as shown above) which needs to be typed in. Each time you
type in a character SubRip rembembers the character, so usually
you will need to type that character once. |
|
If SubRip selects
two characters during the process, simpilally type in the
two characters (as shown above). |
If characters that
dont occur on the keyboard such as ©, ½ etc, select
the Character Map and search for correct
character, and copy/paste into Subrip. |
Some problems can
occur such as the percent character(%) , SubRip may only select
° of the percent character, so what I do is type in %
for the SubRip ° selection, then just click OK
for the other sections of %. |
When finished go to Corrections>Post
OCR Spelling Correction, in the bottom window.
|
|
|
Select your desired
language click Correct! |
|
|
Go to Output
Format>Set Output Format. |
|
|
Highlight SubRip (*.srt) click
Convert to this Format.
|
|
|
In the top window
go to Character Matrix>Save Character Matrixs
File |
|
|
his saves the DVD subtitle characters in SubRips ChMatrix
folder, so when doing another DVD, you can check if you
have already saved the DVD subtitle characters, by selecting
Search for an existing Matrix that match
for this Character

|
Finally in the bottom
text window go to File>Save As and
save in your ripped folder. |
It is usually a good
idea to check the spelling, open the saved subrip file with
notepad, and copy and paste all into a program that supports
spelling checks eg Microsoft Word or OpenOffice. |
You can repeat this process for other languages/commentaries
to add to the video, when doing so remember to select Search
for an existing Matrix that match for this Character.
|
Sometimes while watching
a DVD someone will speak in a foreign language briefly and
subtitles will appear. As an example, while watching Lord
Of The Rings an Elf will speak elvish and english subtitles
will appear for translation. These subtitles wont appear in
the language drop down box, so you have to enable Forced
Subtitles, here is how you do it. |
Go to Options>Global
Options |
|
Tick- Force subtitles only
click OK
Select Start
and do the process as discussed.
|
|
|
|
Chapters
open ChapterXtractor
|
| |
|
Under Raw Data tab select Open
IFO, browse to your ripped folder and select the
IFO file.
Select Format tab
|
|
next to Preset: drop down box select OGG
Save data as chapters
Close ChapterXtractor
|
Now we have an AviSynth Script, one or multiple Audio tracks,
one or multiple Subtitle file and Chapters.
|
|
Open VirtualdubMod |
| Go to File>Open
video file... or press Ctrl+O and
select the AviSynth script you made with SwiftAVS.. |
 |
|
Go
to Video>Fast recompress |
 |
Go to Streams>Video chapters
|
|
Select Import and open the chaptersXtractor file.
Next look on the DVD cover, their you will find the chapters
hightlight the first chapter and write in Name: the first
chapter eg 1.Logo/Credits. Select Edit, do the same for
the rest of the chapters. For myself I take an easier way,
go to http://www.blockbuster.com
type the movie name in search, in the movies details page
select DVD Features: where usually the
DVD chapters are kept, and copy and paste the chapters.
You will need to use the keyboard for pasting
(Ctrl V) into VirtualDubMod Chapter section.
When finished click OK.
|
|
Go to Streams>Stream
list |
|
Select Add go to your ripped folder and
select your first desired audio stream, do this step for
other audio streams, then do this step again to add your
subtitles.
Image on the right shows
two audio streams(1&2) and two subtitle streams(3&4).
Click OK
|
|
Video Bitrate |
In the VirtualDubMod main window click on the End
button  , which will bring
the slider to the end of the Track Bar , which will bring
the slider to the end of the Track Bar
which will show the movies length. Take a note of the length
eg 1.35.48.749 (1 hour, 35 minutes,48.79
seconds)
|
| |
Open Ecuadors AVI Bitrate Calculator
(Dont close VirtualDubMod)
|
| Select Video Bitrate Calc

Basic Settings
In Hr:Min:Secs, enter the videos length
as worked out from VirtualDub eg 1.35.48.74.
Audio Bitrate kbps set to 0 from
the drop down box.
No.Of CDs select 1.
Extra Settings
CD Capacity (MB) select your CD/DVDR size
eg 700/800MB, or If you want to copy to DVDR
you can have 4 good quality movies, at 1000MB etc.
My goal in CD size I set is 699MB for a 700MB CD or 799MB
for 800MB CD etc.
As discussed in the Audio section, we determined the audio
size in MB eg 89MB
Extra material (MB) type in 89,
it is a good idea to add an extra 2MB eg 91.
DivX version select 4/5
Click on Advance 
Select frame Type PAL 25 fps, NTSC
23.976 fps or NTSC 29.97 as discussed
in DVD2AVI. click OK
Write down the Estimated Video Bitrate i.e.
878 kbps
Close Ecuadors AVI Bitrate Calculator. |
|
|
|
Go back to VirtualDubMod
Go to Video>Compression
or Ctrl+C
A new window will appear.
|
|
| |
| Select DivX
Pro(tm) 5.1 Codec
Click Configure
A new window will appear. |
| Click the DivX
Codec tab
Go to Variable bitrate mode
choose
Multipass 1st pass.
Go to Encoding bitrate type
in eg 878
as calculated from Ecuadors AVI Bitrate Calculator.
Under Performance/Quality use
thr default Standard but if
you have plenty of time or fast computer, select slow
or slowest for
better quality.
Check Write MV file: box.
|
|
Click the Video tab
Psychovisual Enhancements
use default settings
Go to Max Keyframes
Max Keyframe interval .... frames
For PAL movies type in 250.
For NTSC movies type in 300.
Click OK
Optional
Select Settings in the lower
left corner.
Check Disable the feedback window
Click OK to bring you back to the
main window.
|
|
| Go to File>Save
as... or press F7
A new window will appear. |

|
Next to File name: type in the movies
name
eg Sanjuro
Next to Save as type: select
Ogg Media File (*.ogm) in the drop down
box.
Check Dont run this job now; add it to
job
control so I can run it in batch mode box
.
click Save
|
|
| Go to Video>Compression
or Ctrl+C (again)
A window will appear. |
|
Select DivX Pro 5.1 Codec (again)
Click Configure
A window will appear.
|
|
| |
| Click the DivX
Codec tab
Go to Variable bitrate mode
choose Multipass, nth pass
Optional
Check Update log file if you
wish to do more than two passes.
Click OK
Click OK again to bring you back to the main
window. |
|
| Go to File>Save
as... or press F7
A window will appear. |
|
|
click Save.
Two passes have now been saved.
Optional
If you wish to improve video quality,
Go to File>Save as... or press F7
select Save, (make sure you have checked
Update log file as discussed before) thus
saving
Multipass, nth pass a second time (third
pass)
Next Go to Video>Compression
or Ctrl+C
Select DivX Pro(tm) 5.1 Codec
Click Configure
untick Write
MV file: and Update log file box
Go to File>Save as... or press F7
select Save
Four passes have now been saved.
|
|
| If you want to use
the computer in dub mode
(which will take 4-6 hours)
Go to Options>Preferences...
A new window will appear. |
|
Click on the Main
tab
Go to Dub defaults
Next to Process priority click the drop
down box and select Idle. |
|
| Next step
Go to File>Job control
or press F4
A new window will appear. |
|
|
Make sure you have Job 1
and Job 2 (or Job 1,2,3 and
4 if chosen 4 passes as discussed before)
Optional
If you want the computer to shuts down after the process has
completed select Options>Shut down when finished
Now click Start
This process will take some time. |
|
| |