|
Open SmartRipper
Insert your DVD in your DVD ROM, if SmartRipper
has trouble Reading the vob files,
play the DVD for about half a minute, close the player and
open SmartRipper again. |
| |
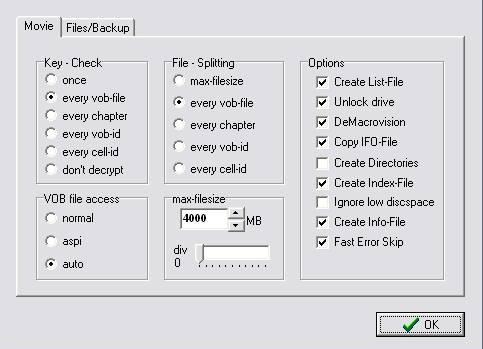
Go to Target  and create
a New Folder in a directory that can easily located i.e. My
Documents, save it under the DVD's title. Go to Setting and make sure the setting are
the same as below. |
| |
| click 'OK'
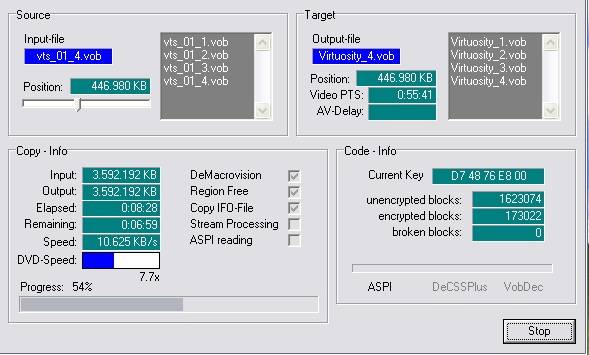
Press the 'Start' Button
It will take about 12-15 minutes to copy all
the VOB files to your hard drive.
close down SmartRipper |
| |
|
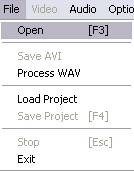
Go to File>Open>go to the folder where
you saved the DVD, select the first VOB file,
click 'Open' and DVD2AVI will automatically
select the rest of the VOB files click 'OK'
|
| |
| |
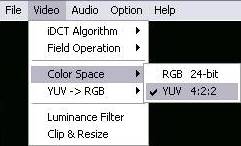
Select Video>Color
Space>YUV 4:2:2 |
| |
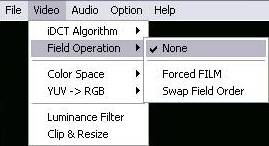
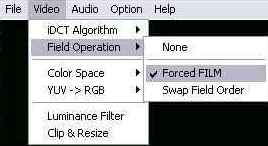
Select Video>Field Operation>None |
| |
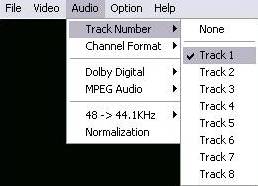
Select Audio>Track
Number>Track 1 (sometimes it
may be the other tracks) |
|
|
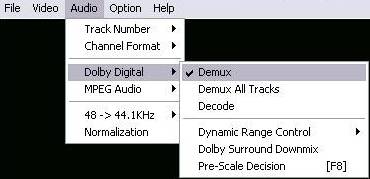
Select Audio>Dolby
Digital>Demux if you have
problems with finding the audio select 'Demux All
Tracks'. |
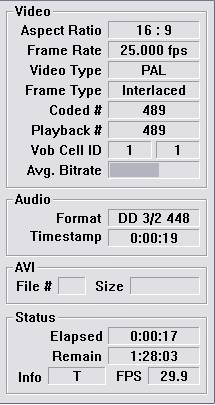
| Press F5(keyboard)
and take a note of the Aspect Ratio,
Frame Rate and Frame Type>press
Esc(keyboard)..
If you have 'Video Type-PAL' and the Frame Type
is Interlaced go to the slider bar and move it, if you notice
lines or some frames are not perfect you will need to use
a deinterlace feature later on.
If you have 'Video Type-NTSC or FILM or FILM
95%-99%' and the Frame Type Is Progressive Go to Video>Field
Operations>Force Film
If you have 'Video Type-FILM' the'Frame Type-Interlaced
move the slider bar, if there isn't any lines
Go to Video>Field Operations>Force Film |
|
|  |
|
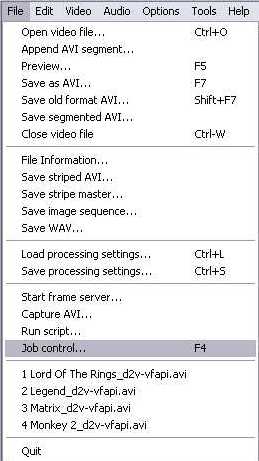
Press F4 or go to File>Save
Project type in the movies name hit 'Save'.
When the process is finished you will have a
d2v file and ac3 or mpa file.
Close DVD2AVI.
|
|
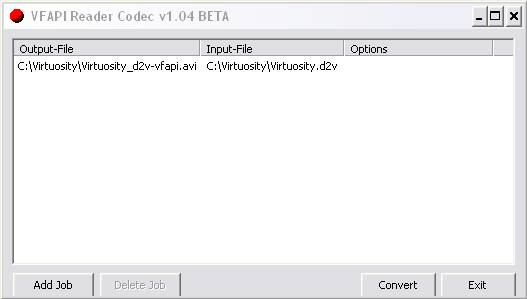
Open VFAPI Reader
VFAPI makes a fake avi file that reads the VOB
files, this is the quickest process(about 3-5 seconds).
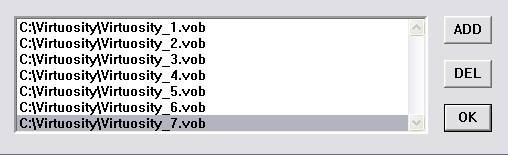
Click 'Add Job' open the d2v file you just
made, another window will pop up
|
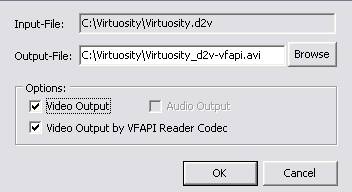
click ' OK' |
| |
| Click 'Convert'
the process takes 3-5 seconds.... Exit VFAPI Reader. |
|
Open Virtualdub
|
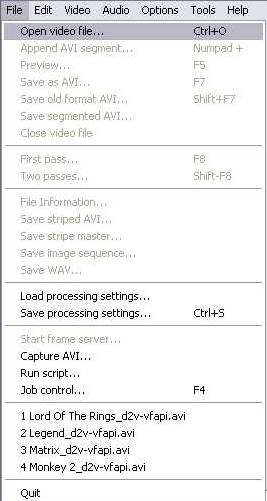
| Go to File>Open
video file... or press Ctrl+O and
select the fake AVI file you made with VFAPI Reader. |
|
|
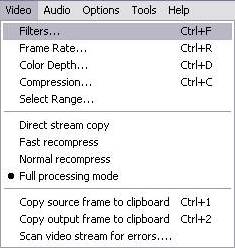
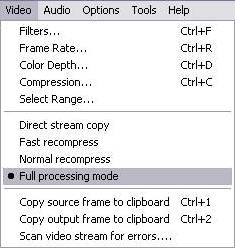
Go
to Video>Full processing mode |
|
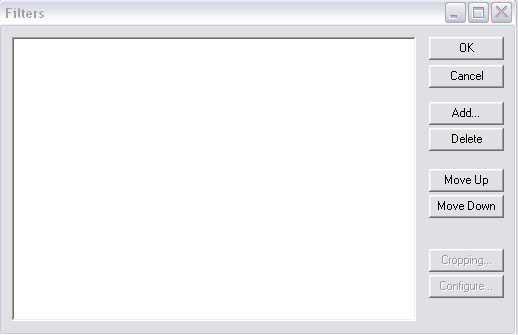
Filters
Go to Video>Filters...
or press Ctrl+F.
|
|
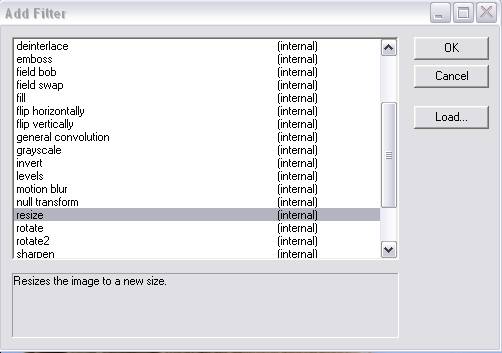
| A
new window will appear. Click 'Add'... |
|
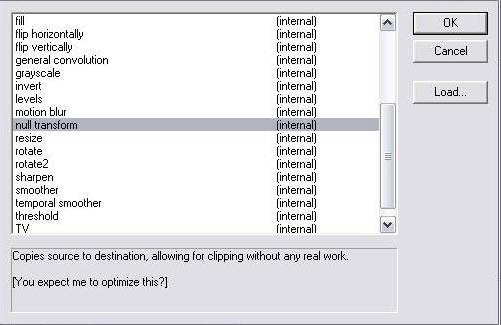
| Cropping
Scroll down and select 'null transform'
click 'OK'.
|
 |
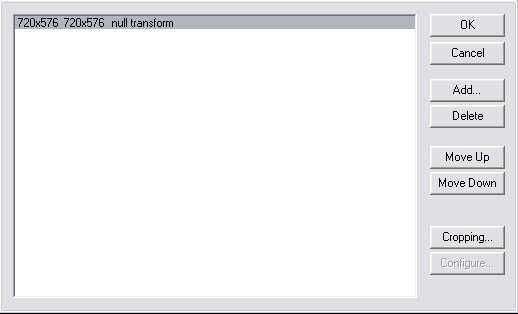
| Click 'Cropping...'
a new window will appear. |
|
|
|
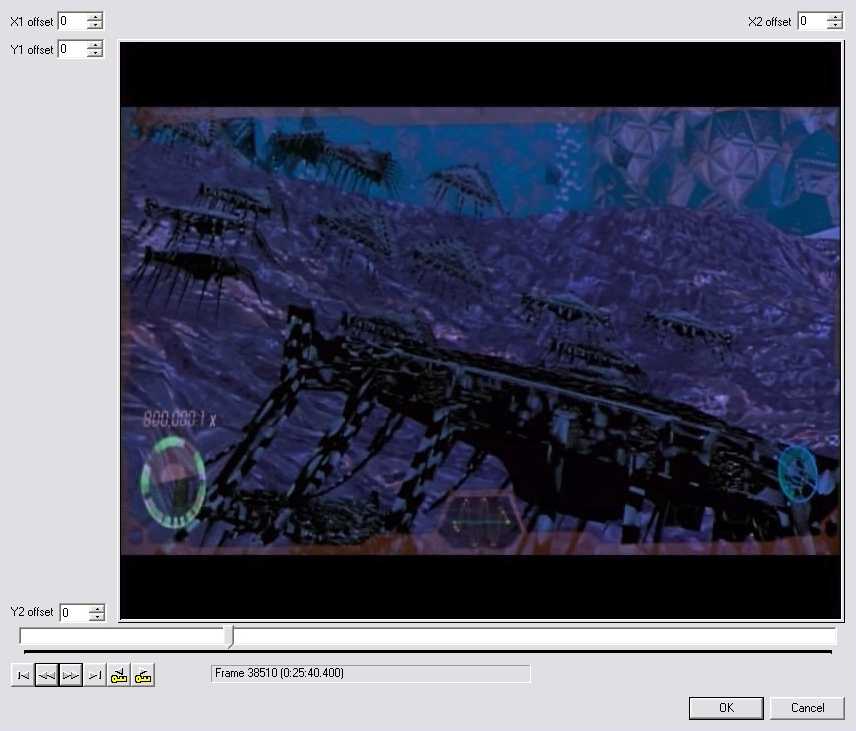
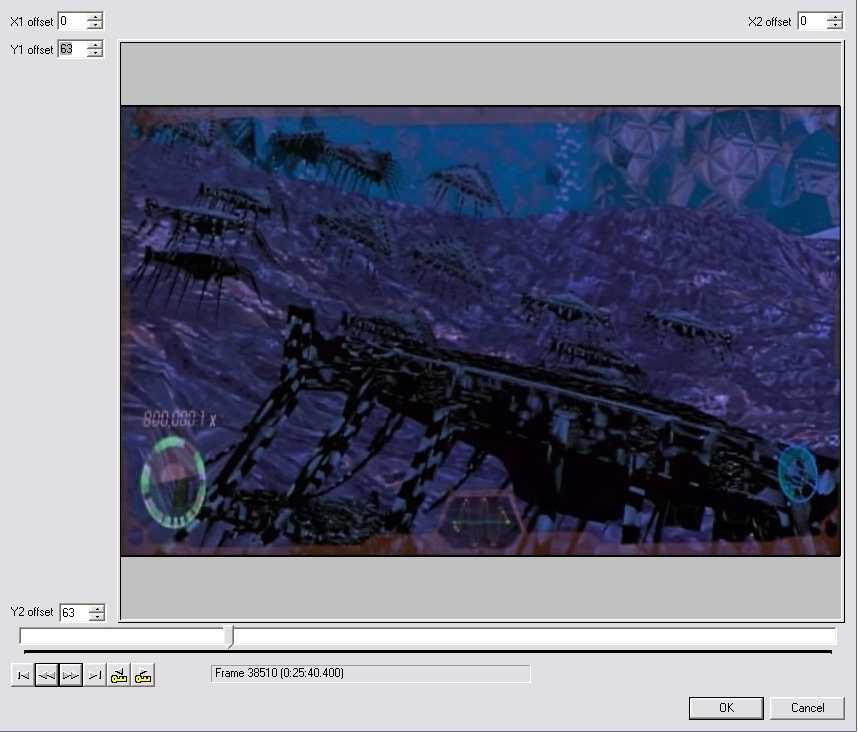
| Move the slider bar
to a bright area. Now use the tools in the window or the mouse
to crop all black areas. |
|
|
| The result will look
like this. Click 'OK'. |
| Aspect
Ratio
Click 'Add...' again scroll
down and select
'resize'. A new window will appear. |
|
| |
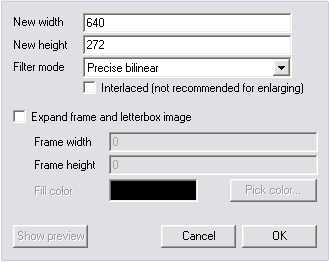
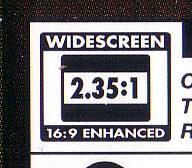
| Look on the back of the DVD cover
where you will find a ratio that relates to the height and
width of the movie (2.35:1). Check the table below (it is
not recommended to go higher than 700 for the width. I have
chosen 640x272, ' width - 640' ' height - 272', choose 576
(width) for lower bitrates.
Go to 'Filter mode' select 'Precise
bilinear'.
Press 'OK' to bring you back to the 'Filters'.
|
|
| 2.40:1 |
2.35:1 |
2.20:1 |
1.85:1 |
1.78:1 |
1.66:1 |
1.33:1 |
| |
|
|
|
|
|
|
| 720x296 |
720x304 |
720x328 |
720x392 |
720x408 |
720x432 |
720x544 |
| 640x264 |
640x272 |
640x288 |
640x344 |
640x360 |
640x384 |
640x480 |
| 576x240 |
576x248 |
576x264 |
576x312 |
576x328 |
576x344 |
576x432 |
| 576x208 |
512x216 |
512x232 |
512x280 |
512x288 |
512x312 |
512x384 |
|
| If the ratio isn't on the DVD cover
try here http://us.imdb.com/ type the film in search,
on the left of the films page, click on 'technical specs'......
|
|
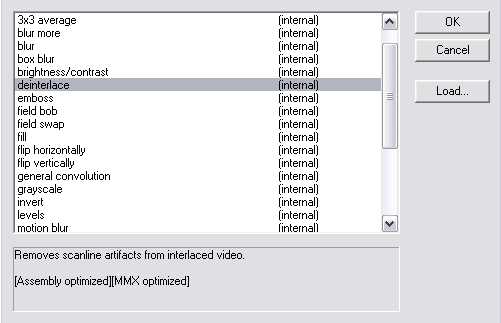
If it was found that you had interlaced artefact
as discussed before, you need to preform a deinterlace feature.
Go to Video>Filters...
Click 'Add'
Scroll down to 'deinterlace'
Click 'OK'
A new window will appear. |
|
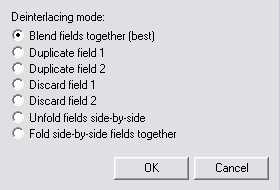
| Check 'Blend
fields together (best)'
Click 'OK'
Click 'OK' again to bring you back to the
main window. |
|
| |
| |
In the VirtualDub main window click on the 'End'
button  , which
will bring the slider to the end of the Track Bar , which
will bring the slider to the end of the Track Bar
which will show the movies end Frame and
length. Take a note of the length
eg 1.41.31.880 (1 hour, 41 minutes, 31.88
seconds)
round it off to 101 minutes (or 102 minutes) and take a
note of the End Frame eg 152297.
|
| |
| Move the slider back
until to the beginning of the end credits and take a note
of the Frame eg 146584 |
| |
OK now we have the length of film (101 minutes),
start of end credits (146584) and end of
end credits (152297)
|
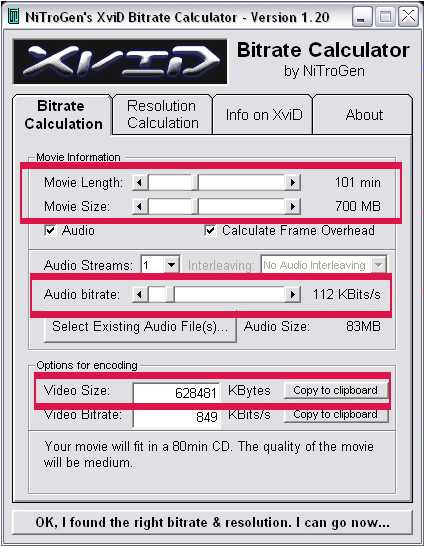
Open XviD Bitrate Calculator
|
| As worked out in VirtualDub
select correct Movie Length:
Select CD size eg 700MB
Audio Bitrate select between 96 kbps
- 192kbps, if you want to
sacrifice audio quality for better quality video choose 96
kbps.
Write down the Video Size: eg
628481
or click on 'Copy to clipboard'
|
|
| |
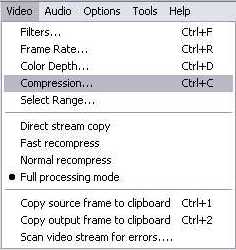
| Go to Video>Compression
or Ctrl+C
A new window will appear. |
|
| |
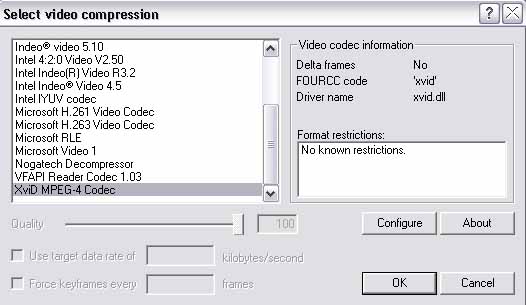
| Select 'XviD
MPEG-4 Codec'
Click 'Configure'
A new window will appear. |
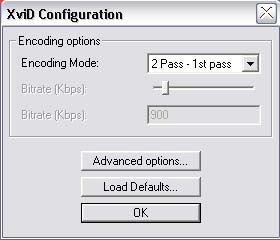
Select '2 Pass - 1st pass' in 'Encoding
Mode:'
Click 'Advanced options...'
|
|
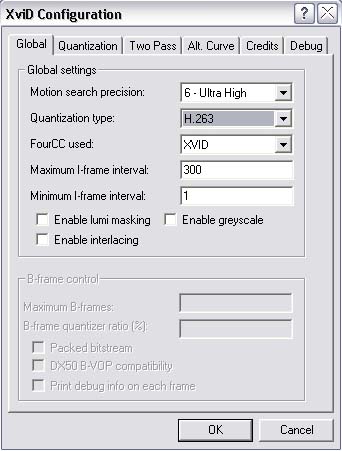
Select 'Global' tab
Motion search precision: select '6
- Ultra High'
Quantization type: select H.263
FourCC used: select XviD
For PAL movies type in 250.
For NTSC movies type in 300.
If you selected Force Film in DVD2AVI type in 240.
|
|
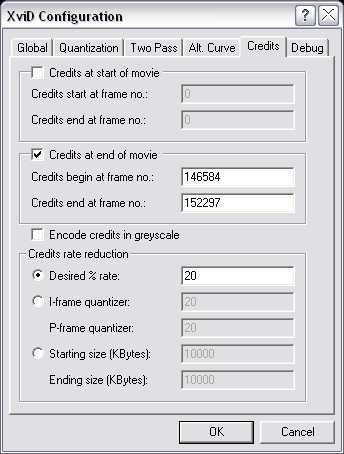
Select 'Credits' tab
Check 'Credits at end of movie'
Credits begin at frame no: 146584
Credits end at frame no: 152297
(As worked out from VirtualDub's Taskbar)
Click 'OK'
Click 'OK' in the 'XviD Configuration'
window
to bring you back to the main window.
|
|
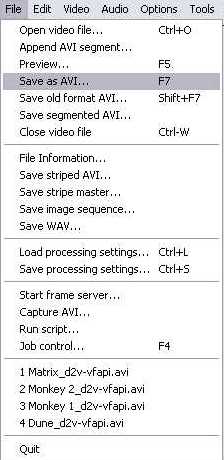
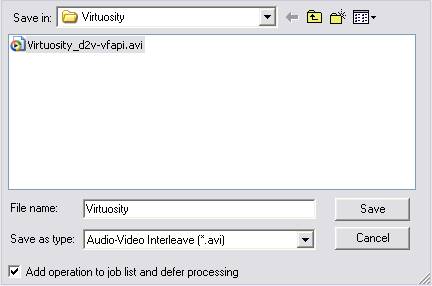
| Go to File>Save
as AVI or press F7
A new window will appear. |
|
First check
'Don't run this job now; add it
to job
control so I can run it in batch mode'
box
in the lower left hand corner (this is important).
Next to 'File name:' type in the movies
name
eg 'Virtuosity' click 'Save'
|
|
| Go to Video>Compression
or Ctrl+C (again)
A window will appear. |
|
| |
| Select 'XviD
MPEG-4 Codec'
Click 'Configure' (again)
|
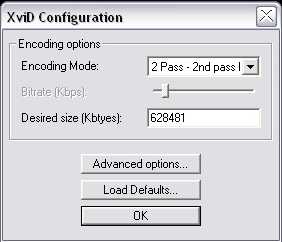
| Select '2
Pass - 2nd pass Int.' in Encoding Mode:
In 'Desired size (Kbtyes):'
put in the number calculated from
XviD Bitrate Calculator's 'Video Size'' (628481KB)
|
|
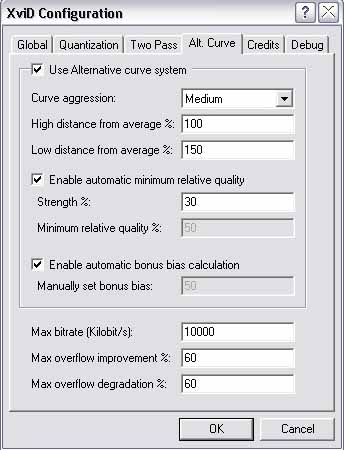
Select 'Alt Curve' tab
Change 'High distance from average %'
to '100'
Change 'Low distance from average %' to
'150'
Click 'OK'
Click 'OK' again to bring you back to the
main window.
|
|
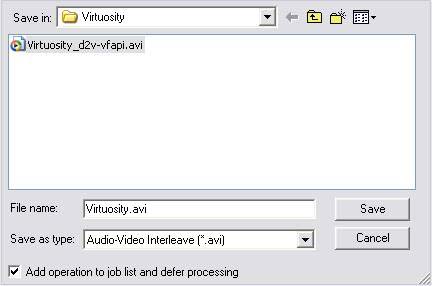
| Go to File>Save
as AVI or press F7
A window will appear. |
|
| Again check
'Don't run this job now; add it to
job
control so I can run it in batch mode' box
in the lower left hand corner (this is important).
click 'Save'.
|
|
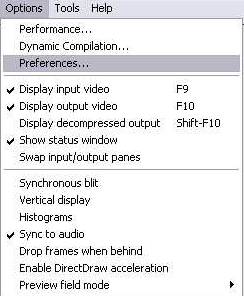
If you want to use the computer in dub mode
(which will take 4-6 hours)
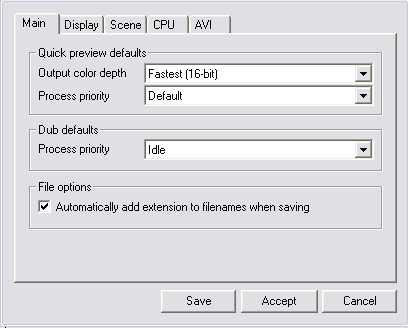
Go to Options>Preferences...
A new window will appear.
Click on the 'Main' tab
Go to 'Dub defaults'
Next to 'Process priority' click the drop
down box and select 'Idle'.
|
|
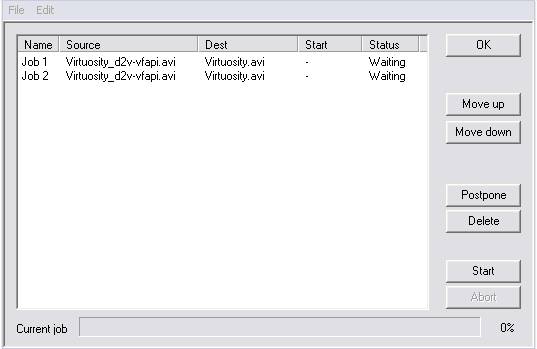
| Next step
Go to File>Job control
or press F4
A new window will appear. |
|
|
|
| Make sure you have
'Job 1 and Job 2'
Now click 'Start' the process will take 4-8
hours. |
When the process has finished you will have a DVD quality
DivX video (no audio),
eg Virtuosity.avi. Close VirtualDub
|
| Open
Headac3he (Audio) |
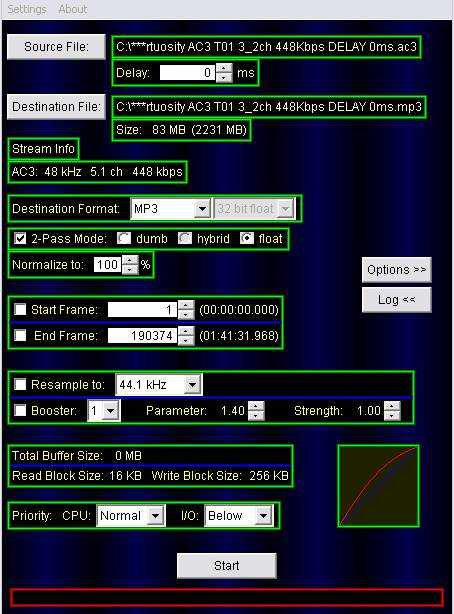
| Go to 'Source
File' browse to the folder and open
the ac3 or mpa file you made with DVD2AVI.
Go to 'Destination Format' go to the
drop down box and select MP3.
If you have an older version Sound Card you
will have to check 'Resample to 44.1 kHz'.
|
|
| Select Options>>
Go to 'Downmix Type' and select '2ch'. |

|
|
Next step is work out how large the Audio is
going to be. (don't close Headac3he minimize
it)
Open 'Windows Explorer' go to the DVD rip folder, right click
the avi file you just made eg Virtuosity.avi go to properties
and look at the size.
The avi size is for example 609mb, subtract
609mb from 700mb (1 CD) and subtract 3mb (700-609-3=88) write
down 88.
|
|
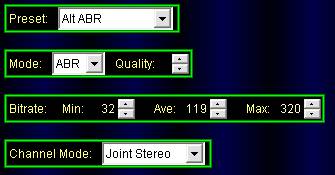
Click Options>> again
Next to Preset: select 'Alt
ABR'
Next to Mode: select 'ABR' |
Go to Bitrate:
Go to 'Ave:' click the up or down box until
the
Destination File Size: is 88MB
as worked out before.
In 'Channel Mode' check 'Joint
Stereo'.
Click 'Start'

|

|
Once the encoding has finished close Headac3he.
Open Nandub
|
| Go to File>Open
video file... or press Ctrl+O.
Open the encoded avi file (not the VFAPI avi file). |
|
Go to Video>Direct stream copy
|
|
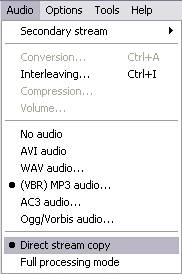
| Go to Audio>Direct
stream copy |
|
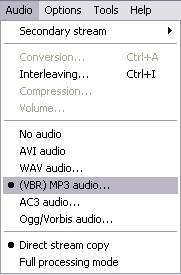
| Go to Audio>(VBR)
MP3 audio
A window will appear
Select the mp3 you made with Headac3he. |
|
| Go to File>Save
as AVI... or press F7
A window will appear.
Next to 'File Name' type in
a 'new name' for the movie
eg 'Virtuosity with audio' etc, the file
name must be different.
Click 'Save'
In one to two minutes your movie will be complete
with sound.
If the Video is in sync with the Sound and the
size is at or just under 700MB eg 699MB thats it! You can
now close down all programs, burn it to CD or transfer it
to a Videos folder and delete the folder where the file were
held....
If your movie is a few mb over 700mb for 1 CD
eg 703mb go back to Headac3he and change
the 88mb to 86mb or 85mb and then follow the Nandub
guide again.
If the video isn't in sync with sound go to
Headac3he follow the same procedures as before
but change the 'Delay:'
1000ms=1 second 
|
|
|
|